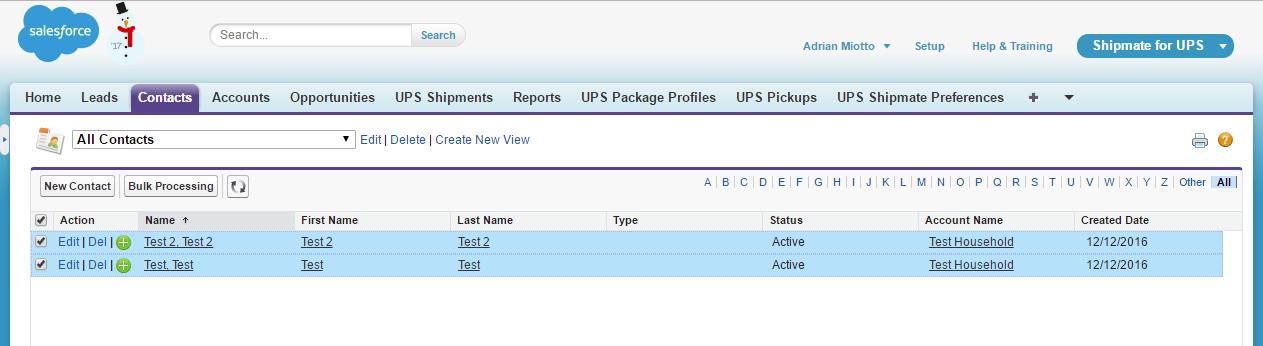
Today we are going to create shipments in bulk from the Contacts list view. By the end of this tutorial you will be able to add a button to the contacts list view as you can see here:
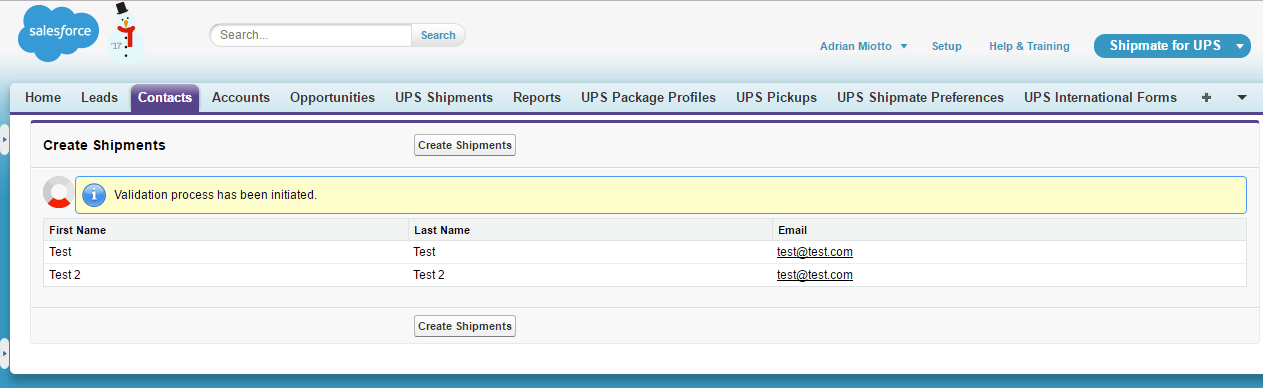
This will take you to the preview and bulk processing page here:
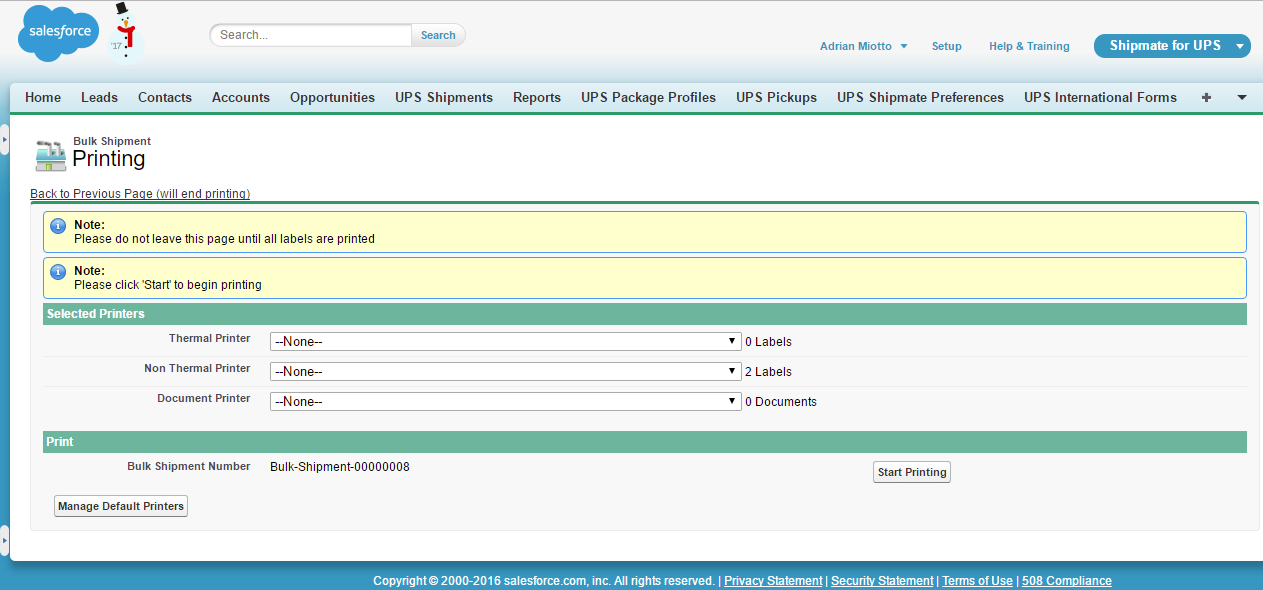
Once the shipments have been processed you will be redirected to the printing page:
Below are the steps:
1. Create the visualforce page. Code is below:
Make a note of line 11 above, this is the poller that runs every 5 seconds once we have sent our shipments to be processed. It’s used to check the current status of the bulk processing. If there are errors it will display them, or if the process completes successfully you will be redirected to the printing page.
2. Now, the main part of the programming takes places, which is our controller. Here is the full code snippet, and we will explain sections of it below:
The controller retrieves the list of selected contacts and creates a queued shipment object for each of them. Once that’s completed, we add this list of queued shipments to a bulkshipment object and then request the processing of this bulkshipmentobject via the processbulkshipments method.
Lines 6-8 retrieves the IDs of the contacts that we have selected on the previous page and Lines 10-15 selects the relevant shipping information for each of those contacts:
The next code block gets called when we click on the CreateShipments button on the VisualForce page we created earlier. The first thing we need to do is to create the BulkShipmentID that we will be adding all the queued shipments to (Line 6).
Lines 7-12 is where we create one queued shipment for each contact that has been selected, and add it to the queuedPackagesList. Line 9 is where we call the createQueuedShipmentRecord method, and we will explain this method a little later in this blog post.
For each queued shipment we have to create the package information so that UPS knows the weight and value of each package (Line 14-23).
At Line 26 we set the bulk Shipment to start the validation process, and Line 28 is where we start the poller.
The next code block is used to check the status of the current bulk shipment once it’s been sent for processing.
Some important lines to note here are:
- Line 4, retrieves the current BulkJob status.
- Line 21, if there are no validation errors we can send the shipments to be created.
- Line 37, which sets where the user should get redirected to once all the shipments have been generated. In this instance we are sending the user directly to the printing page. Code below:
Now we get to the createQueuedShipmentRecord method and this is where we set the ServiceType, Packaging Type, Send from and Send to addresses.
Lastly, we call the validate and process bulk shipment methods that are referenced in the checkStatus method.
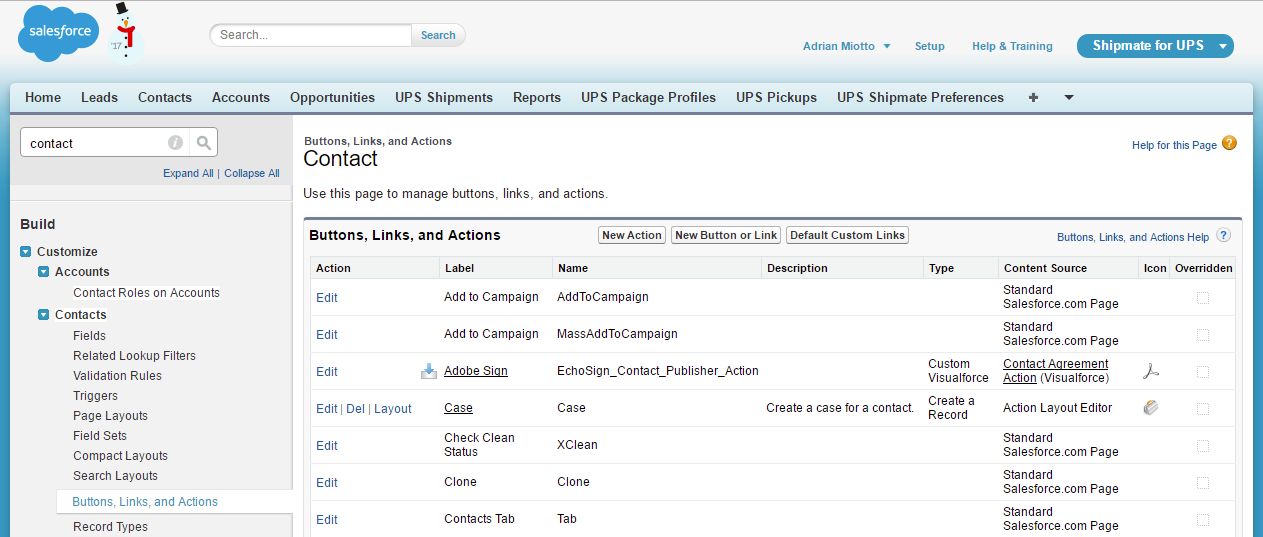
3. Finally, we tie it all together by creating the custom button on the Contacts list view to link to our new visualforce page.
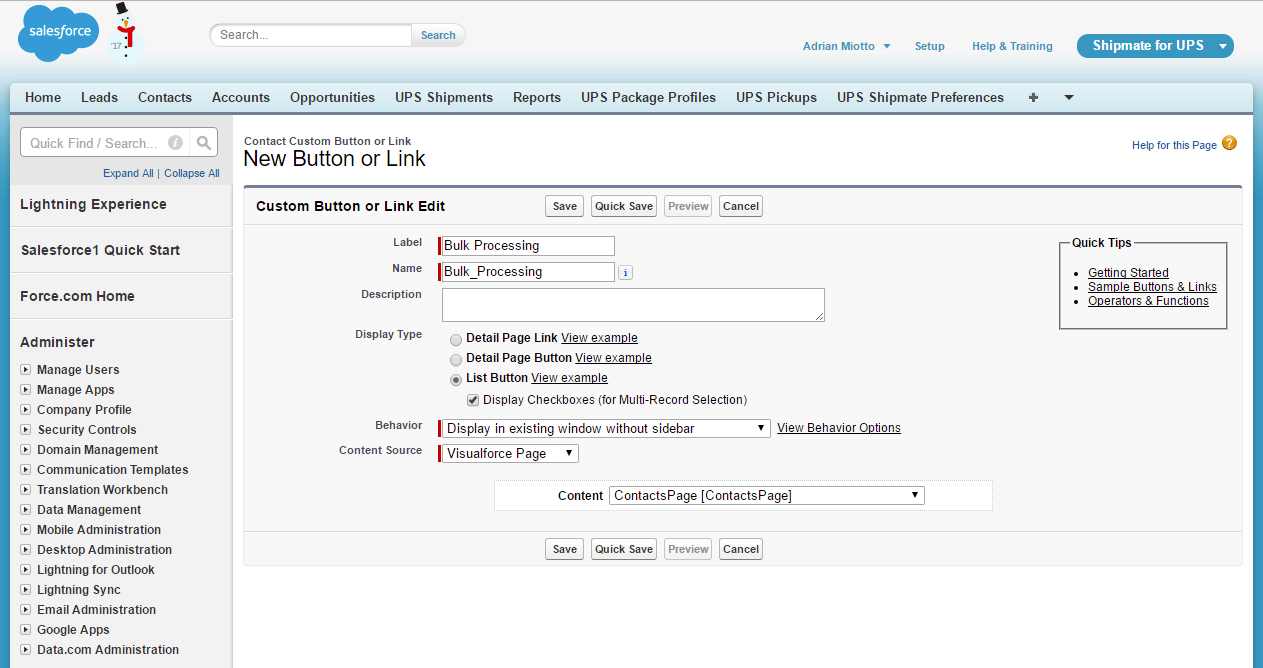
We need to create a custom button on the contacts object. We do this by going to Setup > Customize > Contacts > Buttons, Links, and Actions and clicking on “New Button or Link”
Complete the fields as you see here:
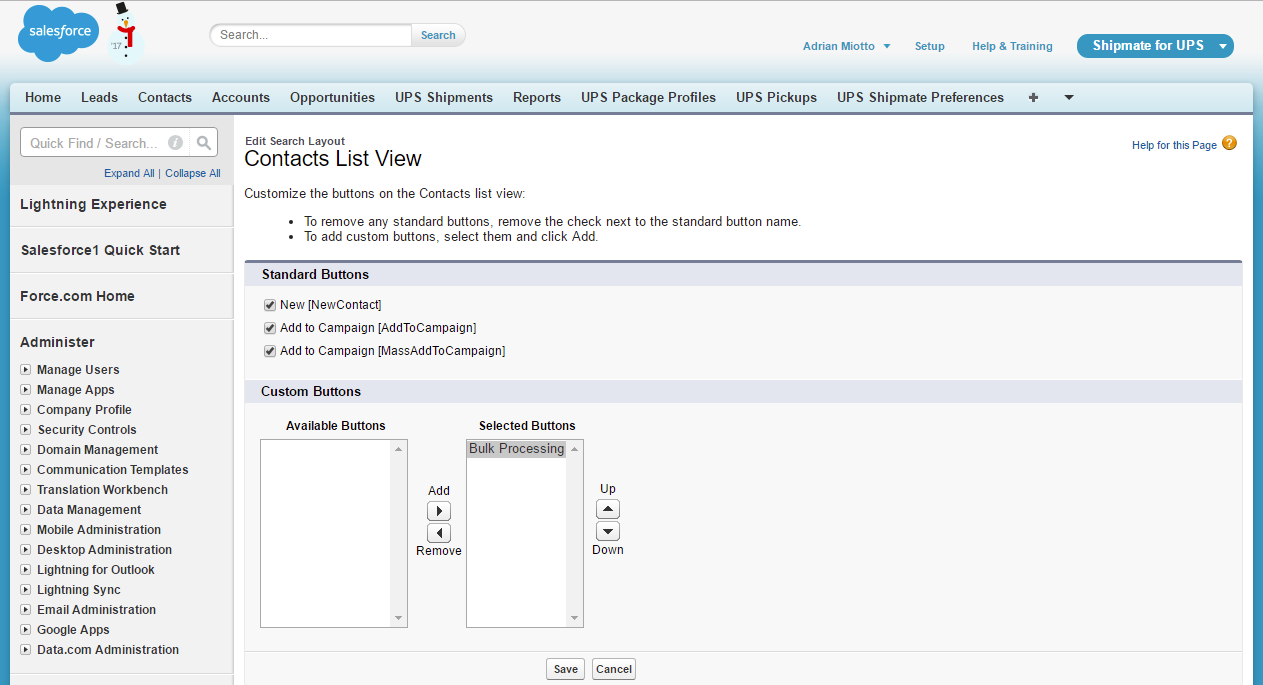
Next, add this button to your Contacts list view, which you can do by first going to Setup > Customize > Contacts > Search Layouts and editing the “Contacts List View” layout. Once this is done, move the bulk processing button you just created across to the “Selected buttons” section.